GTM Custom Templates: Set Cookie ID
This is the second in a short series on custom templates. The first one was a template to create a variable that checked whether a value existing in a cookie or not. This one is setting the value of the cookie itself and can be used in conjunction with hitCallback.
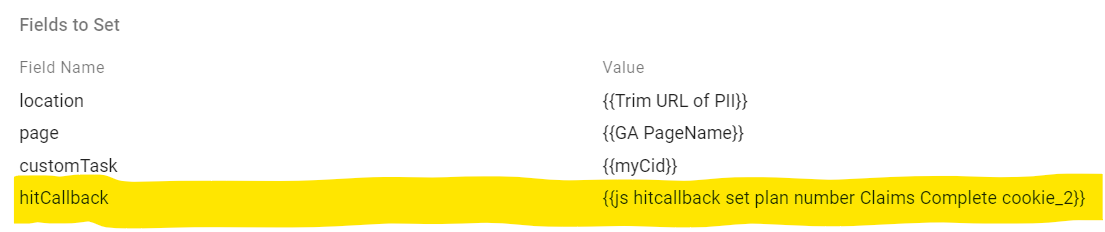
Let’s start with hitCallback, because it is probably a function not commonly used and many will be wondering what I’m talking about. hitCallback is a function that sits in Analytics.js (so can only be used in conjunction with Analytics tags, but that is ok in this context). It allows you to fire a function after the analytics tag has been successfully sent. Where is this useful? This is useful in cases where you want to do something that recalls a value that has been set for future reference (without influencing the existing hit).
In our case we triggered a value into a cookie that we could use in future cases so that we could stop tags being fired again in the future (ie trigger a one off tag). To do this we needed to set a cookie and set the value of the cookie to be our variable we want to compare against. Here is what the custom template looks like:
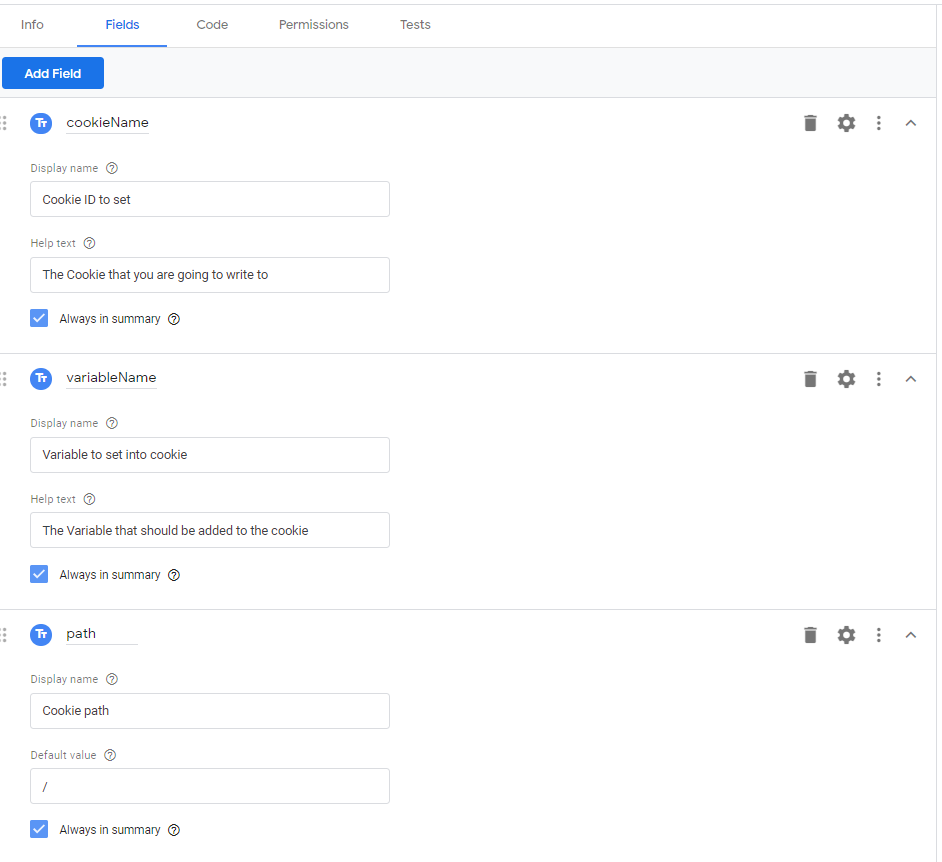
Fields
The fields for this one are slightly more complicated than check cookie and they will have more of an impact on what you are doing. Firstly we need to get a Cookie Name – this is the name of the cookie that will appear in the users browser (and should be part of all your cookie rules). Secondly we have the variable that we want to capture in the cookie. Thirdly we have a path that the cookie will be in (paths allow you to make a cookie only available to certain folders – we almost always don’t want that, so I have defaulted to ‘/’). I haven’t here, but you could also include whether you want it sameSite and an expiry length (which I’ve hard coded into the template).
What does this then look like when you are creating your variables in the interface?
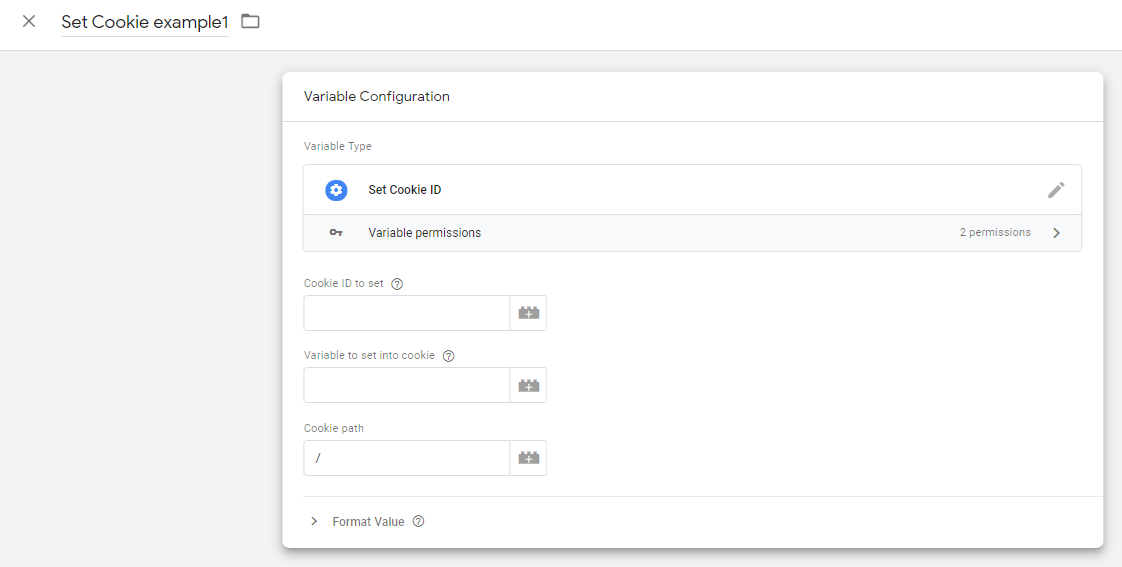
Here when we are creating our variable we have to give our cookie an ID and a value that you want to set in it, as well as the path (defaulted to ‘/’).
Note I also create another variable that is a first party cookie that is of the same name. This allows me to debug easily in the interface when I’m not setting the value of a cookie.
Code
Having created the variable, you then have to make it do something, which is where this code below comes in. Note here I have a ‘max age’ that is set to automatically be two years, but you could make this a field and put it in as mentioned above. I also have no SameSite or Secure values, which you could add if you so wanted to. This bit of code takes the existing value of the cookie and adds a new value on the end from the variable name field.
const setCookie = require('setCookie');
const getCookieValues = require('getCookieValues');
const existingValues = getCookieValues(data.cookieName) + ';' + data.variableName;
const options = {
'domain' : 'auto',
'max-age' : '63072000',
'path' : data.path
};
return () => {
setCookie(data.cookieName, existingValues, options);
};Permissions:
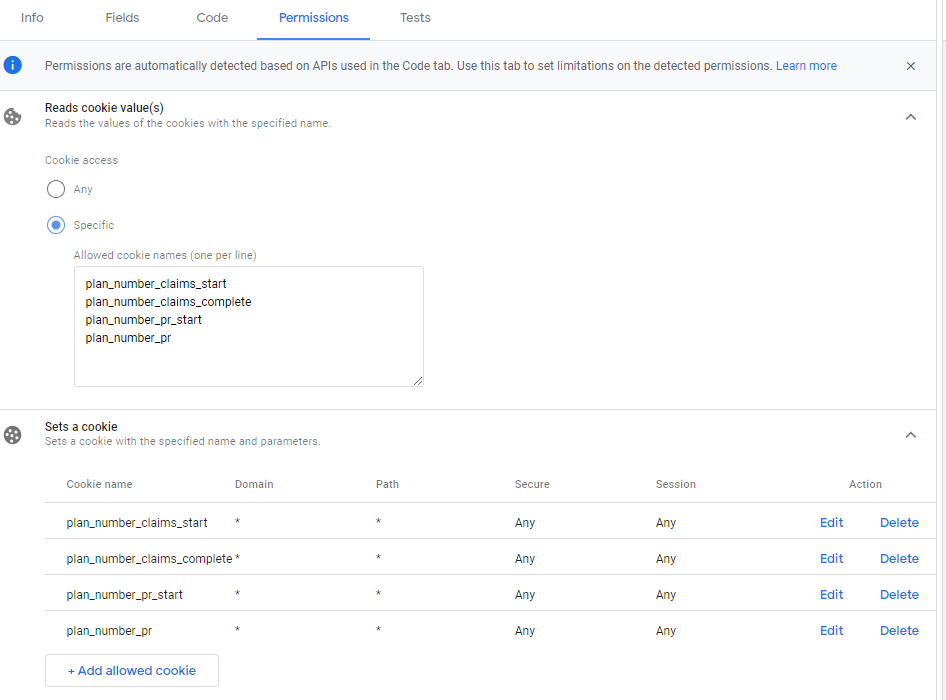
Finally having created the front end template that will be used by the user in the fields section and created the code that works out what to do with it, you then have to give some permissions. With Cookies you need to explicitly list in here the cookies that you want this to be given access to (I guess you could choose ‘any’ but we’d rather it was specific ones). We need to include permissions for both reading cookies (because we need to get the values to append a new one on the end) and setting a cookie (because we need to make sure that it exists).
Applications
The use case for this tag is in hitCallback, as mentioned at the top. Our tag that is triggered when a user completes a action on the site that isn’t a transaction, but we only want it to trigger once. So we use the check cookie as our trigger and we call this function to set the cookie as the hitCallback. The next time the user comes to this page they will have the value of their Claim ID in the cookie to check against to make sure they aren’t triggering the tag twice.
Leave a Reply