Implementing GA4 through GTM
I realise that I haven’t done much GTM stuff on this blog over time – partly because the things that I have done on GTM have been more recent when life has caught up with this blog and made updates occur less often. So with a client’s tech team currently implementing a data layer on their site so that we can set up GA4 properly, I thought now would be a good time to talk about how to set up GA4 with the ‘basics’ and then we can do a bit more customisation in a future post.
Of course, those of you paying attention will have noted that the old Google Analytics was turned off at the end of June (although mine are all still working at the moment) and we are now in July, so we’re running a bit late for this one.
Set up GA4 first
The set up process is relatively simple, but there are a few things that you need to do and watch out for.
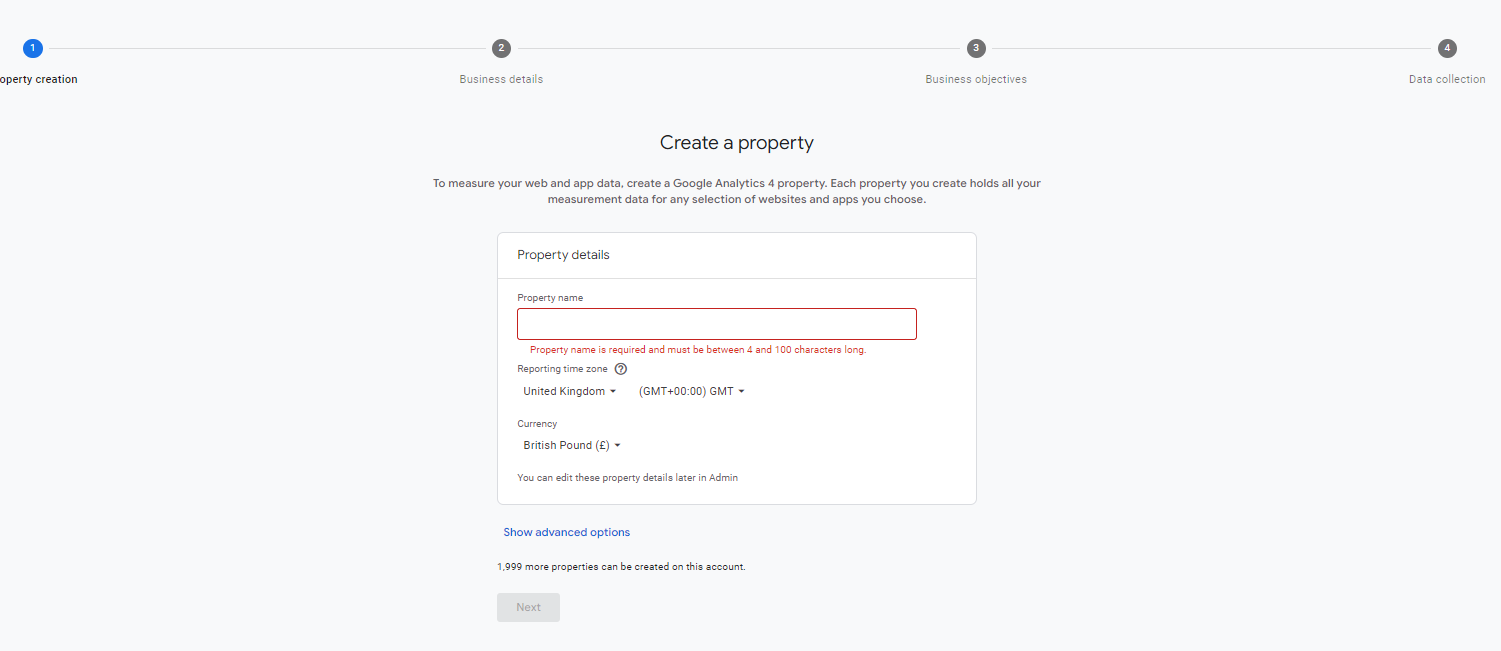
Step 1 – create a new property in the admin part of Google, within your existing account (this is not a new view of an existing property, but a brand new stand alone property – views don’t exist in GA4 world!):
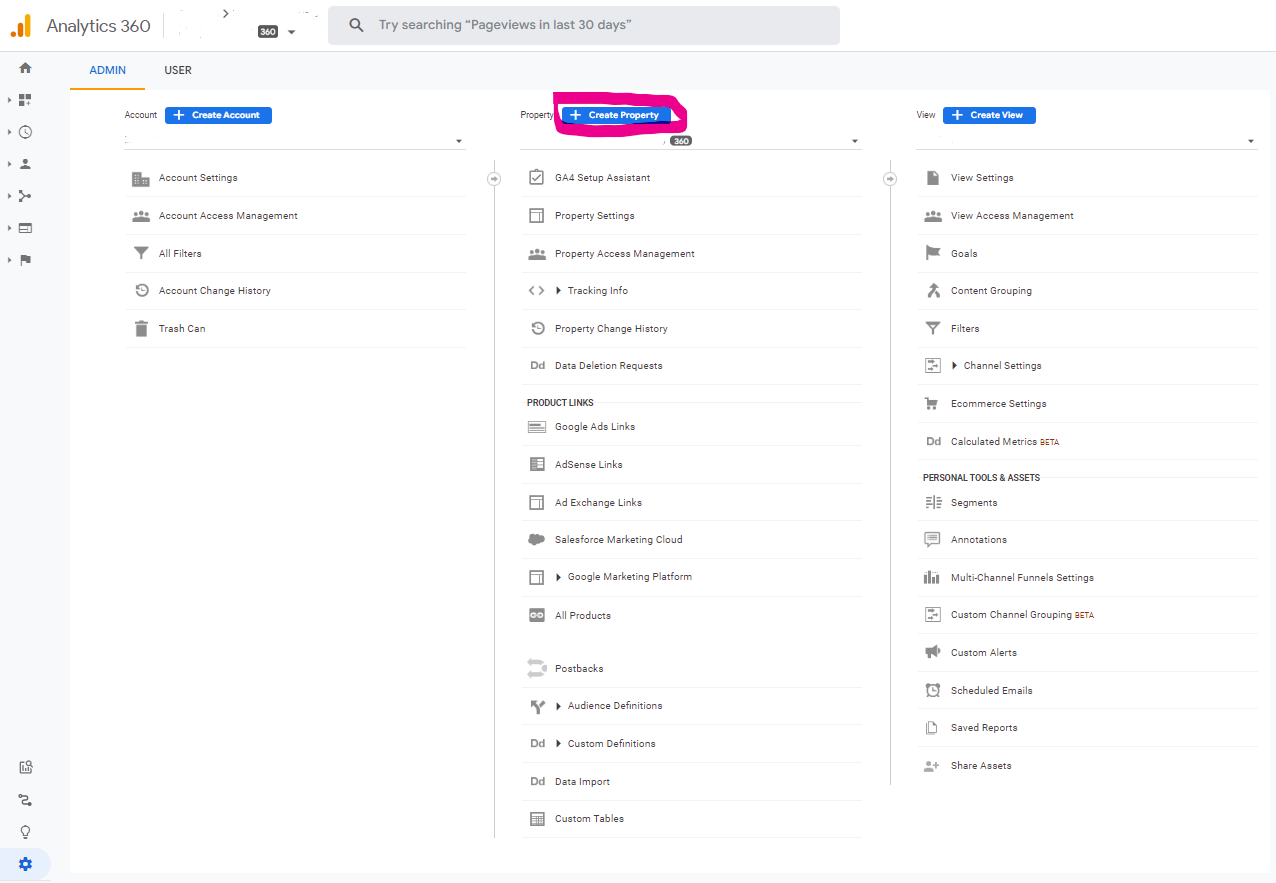
Step 2 fill in the details of the property name and time zone and currency (these are for reporting purposes).
So far I am giving my properties similar names to their existing GA properties, but with GA4 appended on the end – this hopefully should avoid any confusion in the future. But it should be noted that (currently) you can edit these at a later date if you so wish
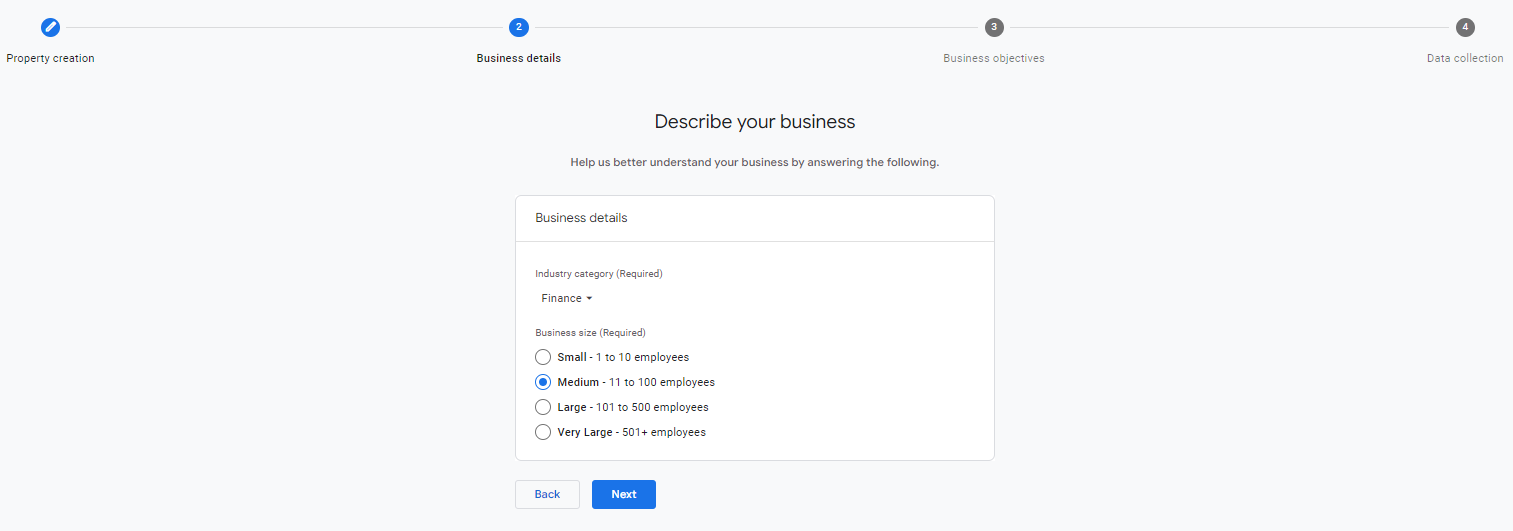
Step 3 is one where if you were doing form optimisation you’d recommend them to take out because it doesn’t seem to give any actual value.
Step 4 in the process seems like another one that you wouldn’t need, but actually this is important because it is deciding what reports are going to appear as default after the account is created (again, fear not, because you can change these at a later date):
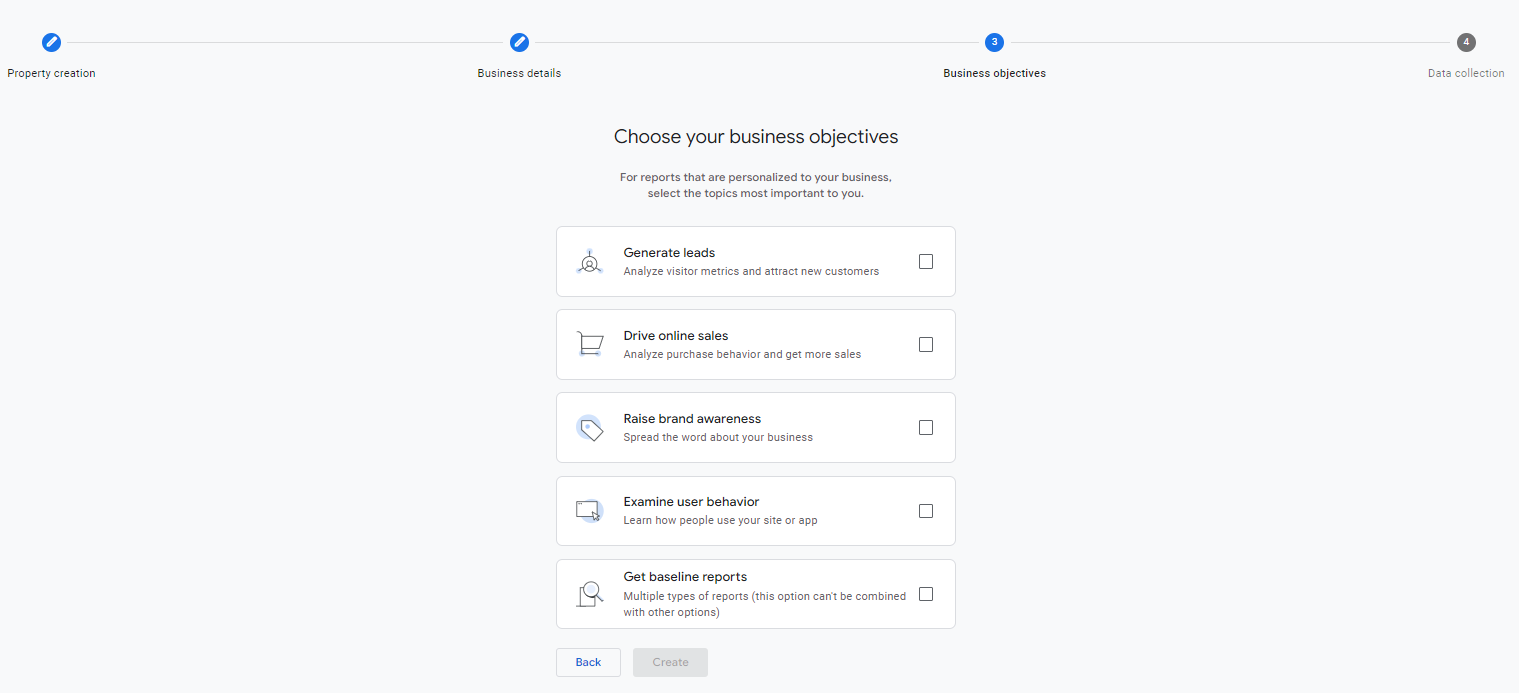
My recommendation if you don’t want to think about it too much is to tick as many boxes as you can and then deal with it at a later date (much easier to remove useless reports than deal with people trying to fudge around a subset).
Step 5 is the bit where it starts to get interesting – setting up a data stream:
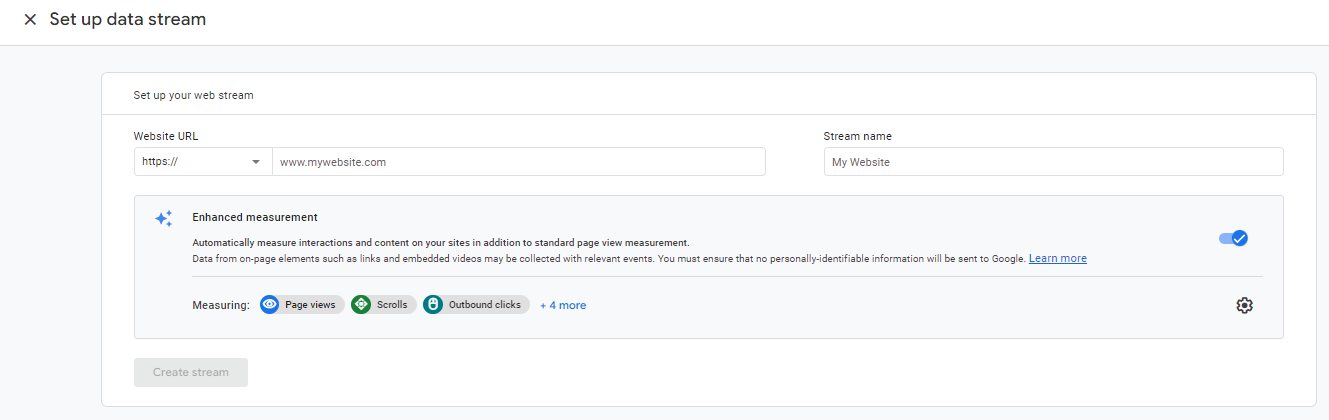
A data stream is a place where your data is collected with common rules in the background. They didn’t exist in GA because you could manage that all yourself in GTM or the code, but in GA4 there are some things that GA does out of the JavaScript that you have no control over. I strongly recommend looking at those options. Click on the cog at the end of the enhanced measurement to see what this means:
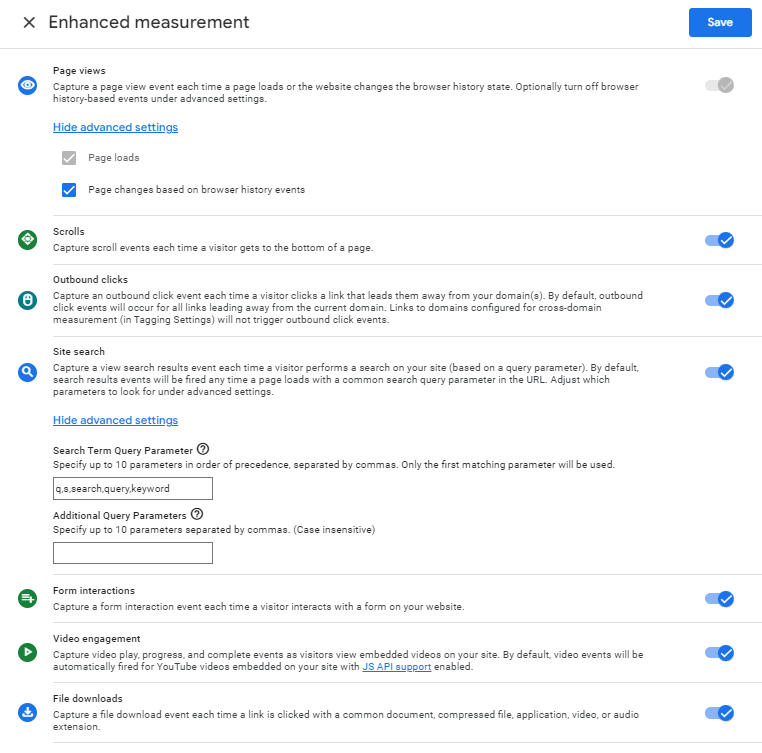
I’ve expanded the advanced settings here so that you can see them, but the defaults are everything that is turned on. Note that a checkbox has been put into place that automatically loads page views when there is a browser history change – if any of your site is a single page app and you are intending to manually tag this, then you should turn that off as it will create duplicate events. I also quite often turn off form engagements, partially because it relies on your forms being recognisable.
In my case, the site does have a lot of single page app history changes and when the data layer implementation exists I will create page view for that in GTM, but as it currently doesn’t, then it is easier to have it ticked here rather than try and fudge it in GTM.
You may also be specifying in your data layer document form downloads and exit links because you want to capture them in a consistent manner with a useful naming convention – again if you are doing that then disable here.
Step 6 – ignore the set up advice.
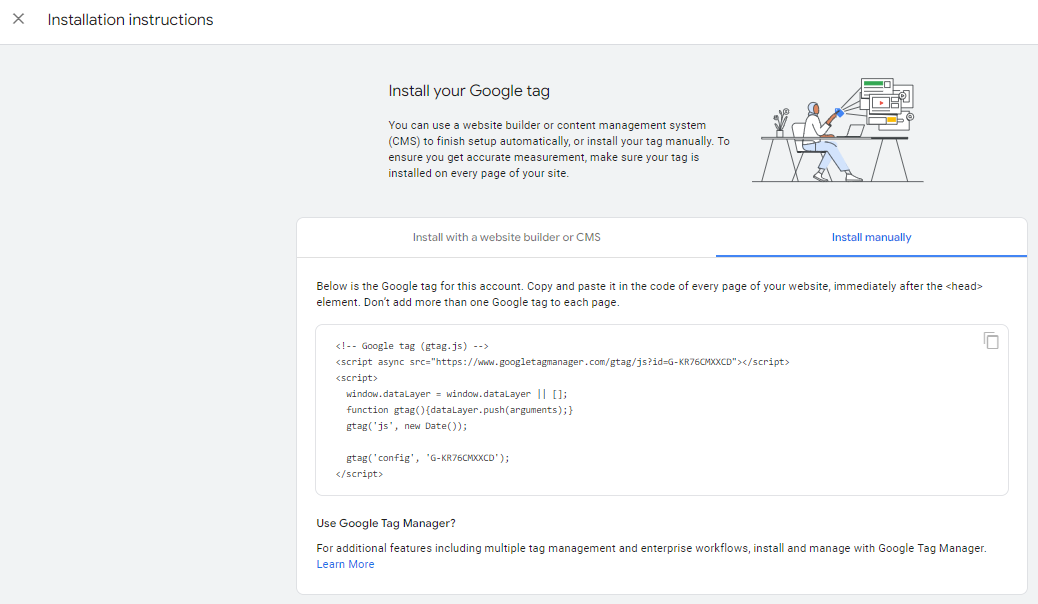
They give you this big scary screen about implementing GA4, but all you really need to know is that if you ignore all their advice there is just one thing about the stream that you need to know and that is on the screen that is hidden behind this one and it is the measurement ID:
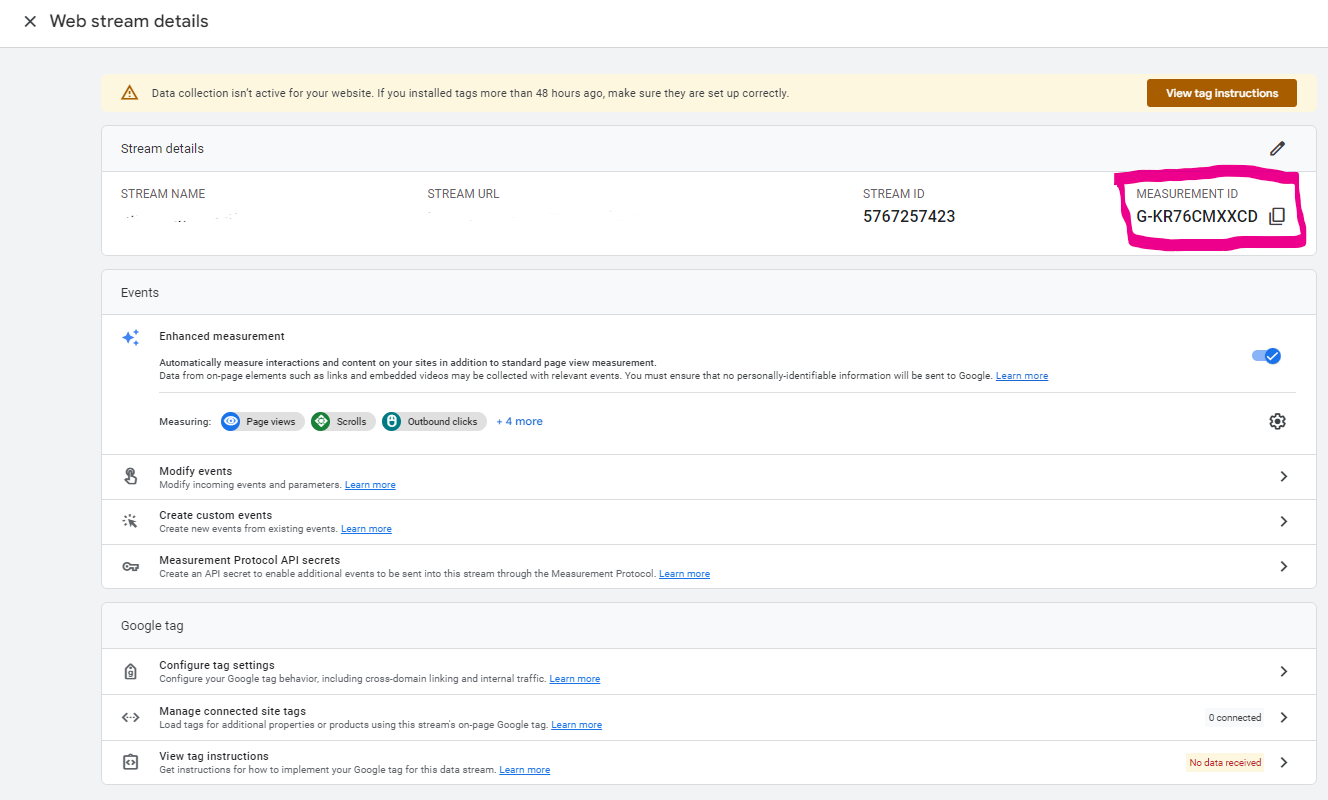
All this information is available on the admin interface as well, so you can go ahead and ignore most of it for now (or play about if you feel like it).
Step 7 – let’s head on into GTM now and I’m going to do a massive step of glossing over creating GTM and implementing the container because hopefully you are already there (but if not then that bit of the process is relatively easy). What we want to do now is go to the tags section and do a ‘new tag’:
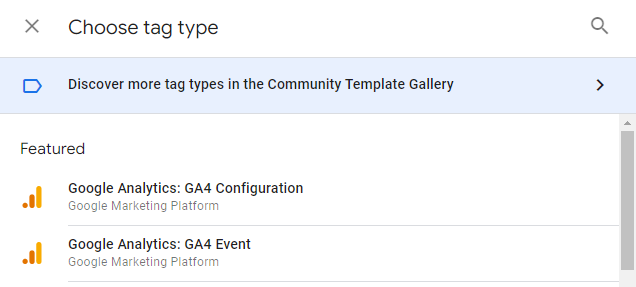
There are two types of tags that you can add in here and they serve different purposes:
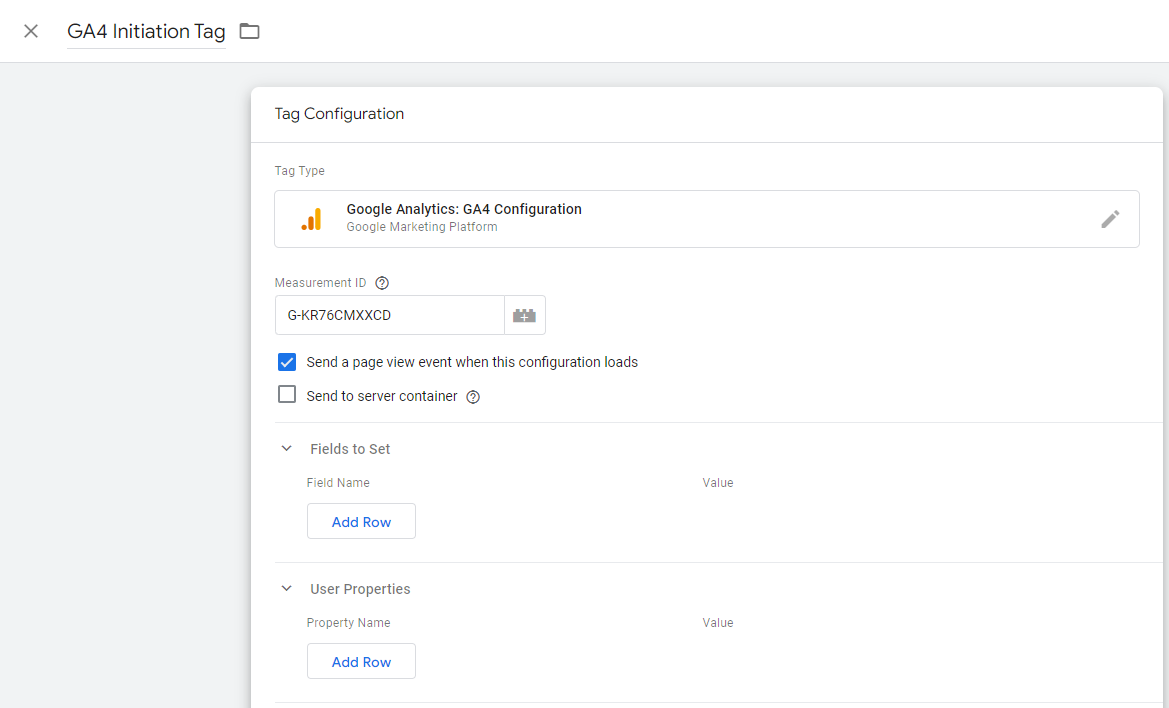
- The GA4 configuration tag loads the underlying JavaScript library and gets all those things in the tickboxes in step 5 running. There is a tickbox in this option that allows you to choose whether you want to fire a page view at this point or not (you don’t have to – the way you have set up could mean you could do that later) and it also asks for your Measurement ID (that’s the bit in a purple box in the screenshot in step 6). The other options that you have which are different to the old GA are that you can set ‘fields’ and you can set ‘user properties’. The fields allows you to set standard and custom parameters so that they can be collected in GA4 (more on that in a future post) whilst the user properties allow you to set things about the users. At the moment I’m not doing that, so I’ll just leave this blank (although my full specification does collect custom data and it will be going in there).
For this tag you need to remember to add in a trigger that is appropriate and also make sure that this fits in with the consent mode that you have set up for the site. For me, for this site and the way I was setting it up (basic configuration) I implemented an ‘all pages’ trigger safe in the knowledge that GTM was supressed until the user had opted in to cookies.
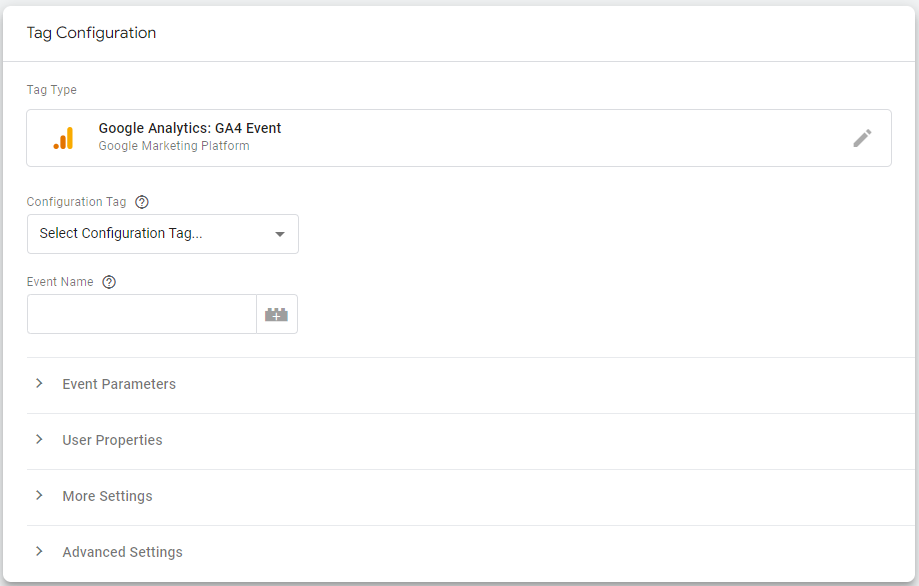
- The other type of tag that you can implement is an event tag. Do not let its name confuse you though (remember that GA4 is event driven reporting), this allows you to implement any type of event including a page view tag (if you didn’t in your previous tag set up) or if you have a single page app (for example). For these tags you will need to give it a name and then any particular custom parameters that you are interested in (more on that in a future post).
Note that if you are going to send through page_view event then you can think about the following dimensions which will have default values:
page_title (this is the title of the page, unless you set a different value)
page_location (this will default to the url of the page – location.href – unless you set a different value) – note that you need the hostname in this as well
page_path (this will default to the bit of the page_location after the hostname)
Step 8 – Test and publish!