GTM Custom Templates: Check Cookie ID
This is the first in a very short series of posts about some custom templates that I built for a client that I thought would be useful to outline to others in case they are interested in using them.
Custom Templates are ways of building a template for variables or Tags that you can use in several places without having to copy and paste the same bit of JavaScript in several places. It can also be useful if you have a server that blocks third party JavaScript from being run as this will run within the GTM tag itself.
This template creates a new type of variable that you can use to check if an existing variable is present in the value of a cookie or not, returning ‘true’ if it is and ‘false’ if it isn’t. This can then be used either in the variable itself to pass a value through into a custom dimension or it can be used in a trigger rule.
(See the second in the series on how to set the cookie using a custom template.)
Custom templates consist of five areas:
- The basic info about the custom template
- The fields that you’d like the user to enter when using the template in anger in GTM
- The code that the template uses to evaluate the values
- Specific permissions that the template needs to run
- Tests that you can set up to ensure it is working as intended
I’ll leave you to build your own info page, but below are the bits that I’ve created for this template:
Fields
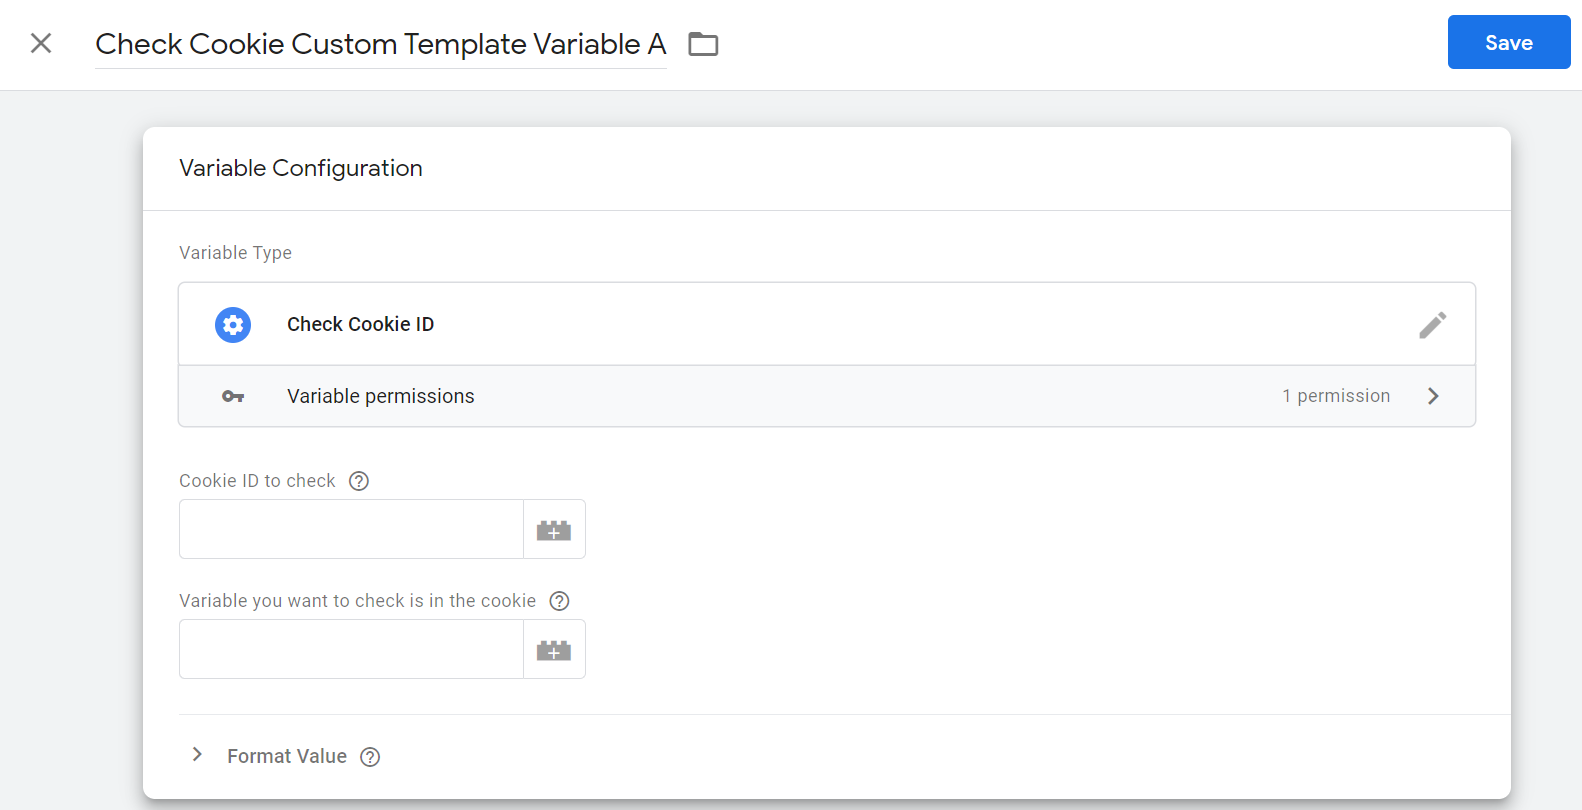
The fields that you need to set for this template are relatively simple. You need a field that asks you for the cookie ID and a field that asks you for the Variable ID. The names that I’ve given them in the titles are the names that we use in the code, whereas the Display name is what a user will see when creating the variable.

This is what these fields will look like when you then try and create a variable with this custom template. You’ll need to put the name of a cookie in the first box and either a value you want to check whether it appears in the cookie or variable to look up the value.
Code
Having created the variable, you then have to make it do something, which is where this code below comes in.
const getCookieValues = require('getCookieValues');
const existingValues = getCookieValues(data.cookieName);
const VariableName = data.variableName;
const existingValues1 = existingValues.toString();
const Match = existingValues1.match(VariableName);
const Match1 = Match.toString();
if (Match1 == VariableName) {
return true;
} else {
return false;
}Permissions:
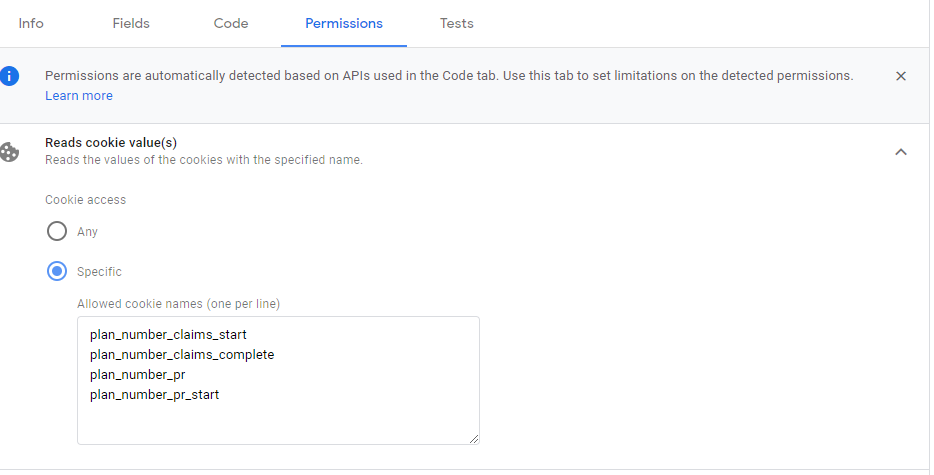
Finally having created the front end template that will be used by the user in the fields section and created the code that works out what to do with it, you then have to give some permissions. With Cookies you need to explicitly list in here the cookies that you want this to be given access to (I guess you could choose ‘any’ but we’d rather it was specific ones). What this does mean is that if you decide to use this template for another cookie then you need to update this page with the template.
Applications
The use case for this was that we had a process that was being used by users whereby frequently they’d return later to complete a process (or by accident to a confirmation page), but because it wasn’t a transaction we had no way of deduplicating them. Rather than having a count of IDs, we decided the best way was that we’d set the value of the process into a cookie and then check if the user had previously.
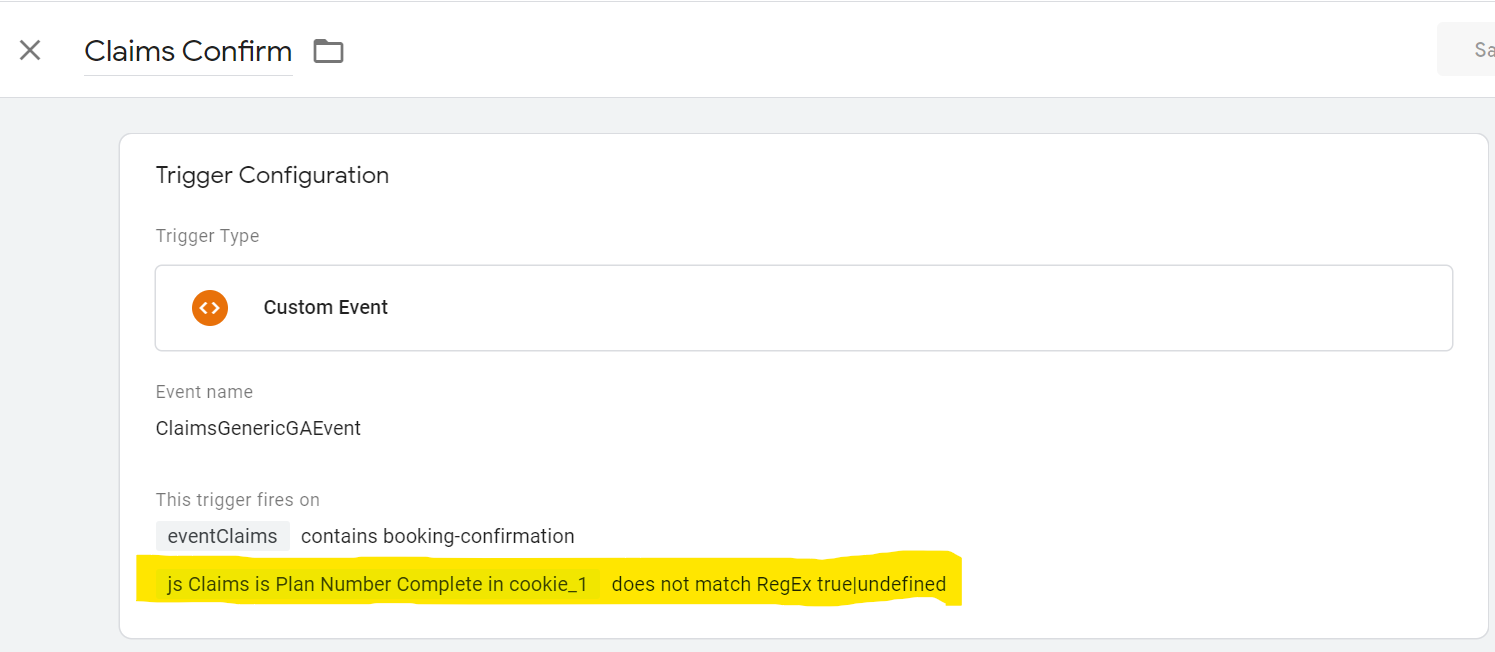
Here is the trigger we used for a confirmation tag – in yellow is our variable that checks if the Claim ID is in the Cookie or not. If it is then we will trigger the tag and if not then it doesn’t trigger. We also use this as a negative match on some more generic tags so that they’ll trigger instead of the confirmation tag in circumstances where the user has previously been to the confirmation page.
There are a number of issues with this method. Firstly, because it is a cookie then it means anyone doing anything like this across different browsers/devices is likely to still be counted twice (so a count of unique Claim ID will yield a smaller number). Secondly if the Claim ID could be used more than once then you may subsequently miss some confirmations. Finally if using this for ‘starts’ then it may mean that you end up with a disconnect between the start and the complete in your conversion funnels as they are no longer ‘visit’ based metrics.
Leave a Reply